How to Add Keyframes in CapCut? (Step-by-Step Guide for Mobile & PC in 2026)
If you’ve ever watched a video where the camera slowly zooms in, text glides across the screen, or a sticker smoothly floats from one side to another that’s keyframe animation doing its magic. And honestly, the first time I figured out how to add keyframes in CapCut, it completely changed how I edited videos. What used to feel robotic and flat suddenly looked polished, intentional, and alive.
In this guide, I’m going to walk you through everything from what keyframes actually are, to adding them on both mobile and PC, to pro tips I’ve picked up from editing dozens of videos. Whether you’re a beginner or someone who just never had the time to explore this feature, by the end of this article you’ll know exactly how to use keyframes in CapCut like a pro.
Introduction to Keyframes in CapCut
Before we jump into steps, let me quickly explain what keyframes actually do because once you understand the concept, everything else clicks.
Think of a keyframe as a “snapshot” of a setting at a specific moment in your video. You tell CapCut: “At second 0, the text should be here and this size. At second 3, it should be over there and bigger.” CapCut then fills in all the smooth movement in between automatically.
That’s it. Simple as that.
Creators use keyframes in CapCut to animate text, add zoom effects to clips, make stickers move, create cinematic pan shots, and sync visual movement to music beats. And the best part? You don’t need to be a professional video editor to use them. CapCut has made keyframe animation accessible to anyone who can tap a screen.
What Are Keyframes in Video Editing?
In animation and motion editing, a keyframe marks the start and end point of any change. The software (in our case, CapCut) calculates and generates all the in-between frames to create smooth movement a process called “tweening.”
For example: if you set a keyframe at frame 1 with a clip at 100% size, then another keyframe at frame 60 at 150% size, CapCut gradually scales up the clip across those 60 frames, giving you a smooth zoom-in effect.
CapCut supports keyframes for position, scale, rotation, and opacity which together cover pretty much every motion effect you’d ever want to create. This is the same fundamental animation concept used in professional tools like Adobe Premiere Pro and After Effects, just made approachable for mobile and desktop users.
Why Use Keyframes in CapCut?
Here’s a quick look at what keyframes actually unlock for your editing:
Smooth zoom in/zoom out effects: Great for reaction moments, dramatic reveals, or adding energy to a scene. Instead of a hard cut or static zoom, you get a flowing, cinematic motion.
Motion tracking-style animations: Move text or stickers to “follow” an object in your video by placing keyframes at multiple points along the timeline.
Text movement and sticker animation: Slide your title text in from the left, bounce a sticker across the frame, or fade an element in and out. Keyframes make all of this possible without any add-ons.
Professional cinematic control: Ken Burns-style slow zooms on landscape shots, slow push-ins on talking-head videos, parallax effects on still images all achieved through keyframes.
Once you start using them, you’ll find yourself adding keyframes to almost every project.
How to Add Keyframes in CapCut on Mobile? (Step-by-Step Guide)
The CapCut mobile interface is built for speed, and the keyframe workflow is surprisingly intuitive once you know where to look.
Step 1: Open your CapCut project on mobile Launch CapCut, tap “New Project”, and import the video, image, or clip you want to animate.
Step 2: Select the layer you want to animate Tap on your video clip, text layer, or sticker in the timeline. The selected element will be highlighted with a white border.
Step 3: Tap the keyframe icon (diamond shape) Just below the video preview, you’ll see a small diamond-shaped icon. This is the keyframe button. Move your playhead to the exact moment where you want the animation to start, then tap the diamond. A small red diamond will appear on your timeline that’s your first keyframe.
Step 4: Adjust position, scale, or rotation Now, without tapping the diamond again, move the playhead forward in the timeline. Then pinch to zoom, drag to reposition, or rotate the clip directly in the preview window. CapCut automatically places a second keyframe at this new position.
Step 5: Move the timeline and add more keyframes as needed You can keep adding keyframes along the timeline for more complex animations. Each time you move the playhead and adjust the element, CapCut logs a new keyframe.
Step 6: Preview the smooth motion effect Tap the play button to watch your animation. The movement between your keyframes will be smooth and automatic. If something looks off, you can tap any red diamond on the timeline to select it and adjust.
Pro tip: Start with just two keyframes for your first attempt. Keep it simple a basic zoom-in or a text slide. Once you see it work, you’ll naturally start experimenting with more.
How to Add Keyframes in CapCut on PC?
The desktop version of CapCut gives you more precision and control, especially for complex animations. Here’s how keyframes work on PC:
Step 1: Import your video into CapCut desktop Open CapCut on your computer, create a new project, and drag your clip, image, or text into the timeline.
Step 2: Select the clip from the timeline Click on the element you want to animate. You’ll see its properties appear in the right-side panel.
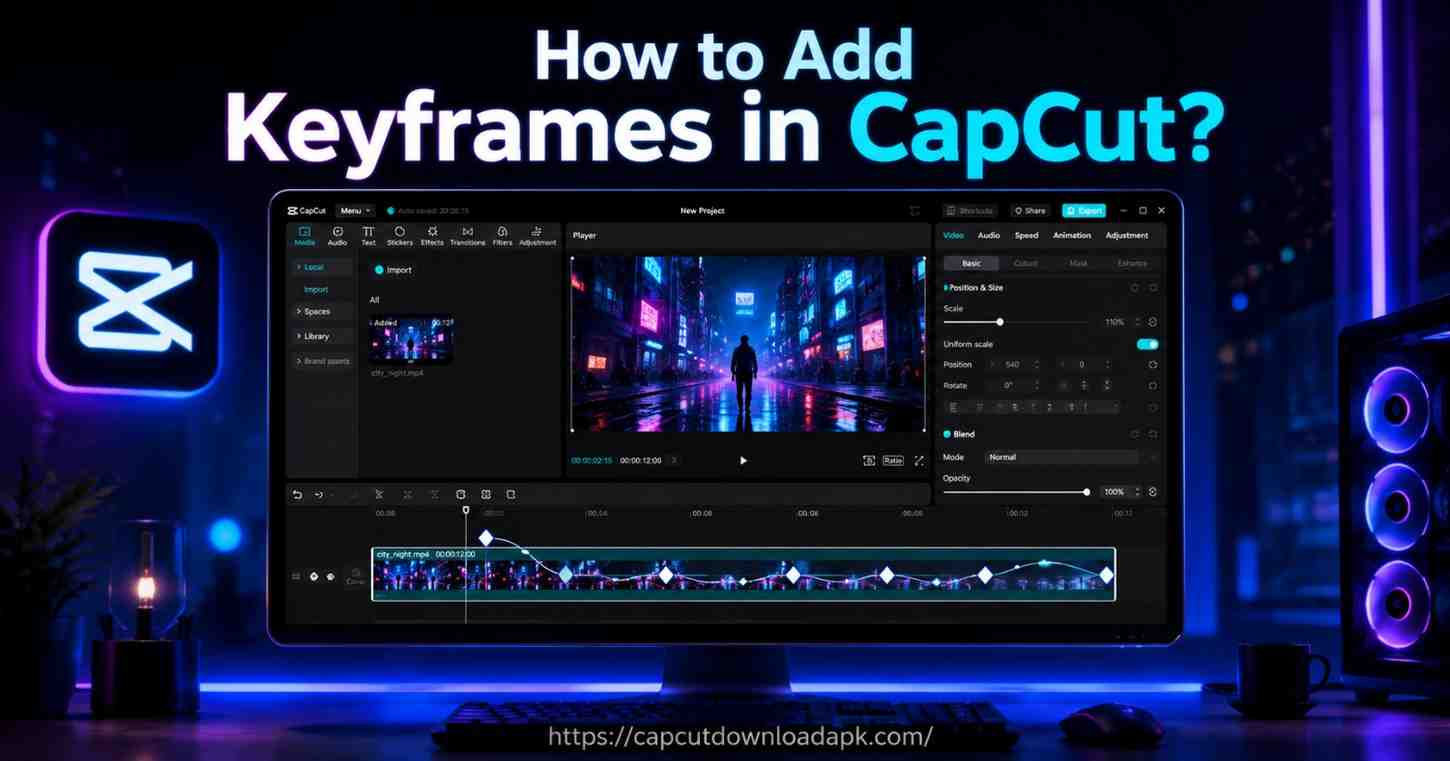
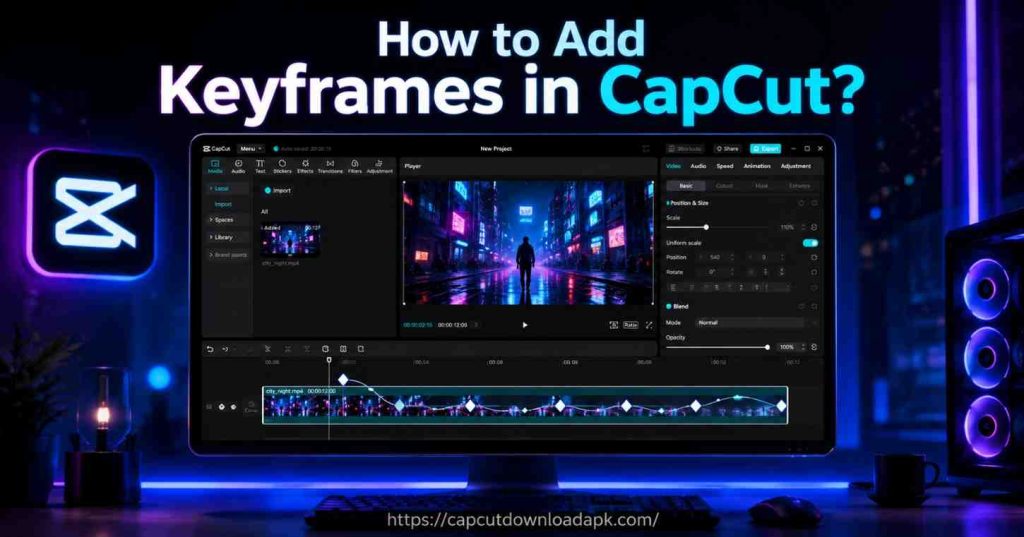
Step 3: Enable transform settings In the right panel, navigate to the “Video” tab and then “Basic”. Here you’ll see controls for Position, Scale, Rotation, and Opacity each with a small diamond icon next to them.
Step 4: Add keyframes for position, scale, or opacity Move your playhead to the starting point, then click the diamond icon next to the property you want to animate (e.g., Scale). This sets your first keyframe. Now move the playhead forward, and change the value (e.g., increase Scale from 100% to 130%). CapCut PC automatically creates a second keyframe.
Step 5: Adjust timing for smooth animation You can drag keyframe markers on the timeline to fine-tune the timing. The closer together your keyframes, the faster the motion. Spread them apart for a slower, more gradual effect.
Step 6: Add easing for natural movement Right-click on a keyframe in the timeline and select “Ease In” or “Ease Out” to add a more natural, organic feel to your animation instead of a robotic linear movement.
Step 7: Export your final result When everything looks right, click “Export”, choose your resolution and format, and save your video.
The PC version is especially useful when working with multiple animated layers simultaneously you can see all your keyframes stacked in the timeline, making complex edits much easier to manage.
Keyframe Types in CapCut (Mobile vs PC Differences)
CapCut supports several types of keyframe animations. Here’s a clear breakdown of what’s available on each platform:
| Keyframe Type | CapCut Mobile | CapCut PC |
| Position | Yes – drag to reposition | Yes – numeric X/Y control |
| Scale | Yes – pinch to zoom | Yes – percentage-based control |
| Rotation | Yes – rotate gesture | Yes – degree input |
| Opacity | Basic fade in/out | Precise percentage opacity |
| Audio Volume | Volume keyframes | Volume + pitch control |
| Mask Animation | Basic mask shapes | Advanced mask path keyframing |
| Easing/Curves | Preset ease options | Custom Bezier curve editing |
Bottom line: Mobile is perfect for quick, intuitive edits on the go. PC gives you surgical precision for professional-level productions.
Advanced Keyframe Editing Techniques
Once you’re comfortable with the basics, these techniques will take your edits to the next level:
Smooth easing for professional motion: Always apply “Ease In” at the start of a move and “Ease Out” at the end. This mimics how real-world camera movement works it doesn’t start or stop abruptly. On PC, you can even use custom Bezier curves for granular control.
Combining multiple keyframes: For a complex animation, don’t be afraid to add 4, 5, or even 6 keyframes in one clip. Just make sure each step of the motion makes logical sense and flows into the next.
Creating cinematic zoom effects: Set a keyframe at the beginning of a clip with scale at 100%, and another near the end with scale at 120%. This creates a slow, subtle push-in that adds drama to any scene especially popular in travel vlogs and short films.
Syncing keyframes with music beats: In CapCut, you can see your audio waveform in the timeline. Place keyframes right on the beat drops or rhythm peaks to sync your visual motion to the music. This technique is huge for TikTok and Reels edits.
Common Mistakes to Avoid When Using Keyframes
Even experienced editors make these errors here’s what to watch out for:
Overusing keyframes in one clip: Adding too many keyframes creates jerky, unnatural motion. Use only as many as you actually need to achieve the effect.
Wrong timing placement: If your keyframes are too close together, the animation will feel rushed. Too far apart and it drags. Always preview before exporting.
Ignoring motion smoothness: Linear keyframe movement looks mechanical. Always add easing where possible to make animations feel natural.
Not previewing before export: This one costs time. Always watch your full edit before hitting export. What looks right in theory sometimes doesn’t land in playback.
Pro Tips for Better Keyframe Animations
These are the habits that separate clean, professional edits from amateur ones:
- Keep motion natural, not too fast: Slow, deliberate animations almost always look better than fast, flashy ones.
- Use minimal keyframes for clean editing: The fewer keyframes you need to achieve an effect, the smoother it will look.
- Combine keyframes with filters and transitions: Pair a slow zoom keyframe with a cinematic filter for a truly polished finish.
- Use zoom for storytelling: A slow push-in on a person’s face builds tension. A pull-out on a landscape reveals scale. Use keyframe zoom intentionally, not just decoratively.
- Save your best keyframe setups: In CapCut PC, you can duplicate clips with keyframes intact, saving you from rebuilding animations from scratch.
Practical Use Cases of Keyframes in CapCut
Not sure when to actually use keyframes? Here are real-world scenarios:
Vlog editing – Slow zoom on establishing shots, text sliding in for location names, smooth transitions between scenes.
TikTok and Instagram Reels – Beat-synced zoom effects, animated stickers, bouncing text animations that catch the viewer’s eye in the first 2 seconds.
YouTube Shorts – Quick, punchy animations to keep energy high throughout a 60-second video.
Gaming edits – Zooming in on key moments, animating kill-count text, adding dramatic slow-push effects on highlight clips.
Promotional videos – Professional product showcases with smooth zoom and pan animations that look like they were made in a studio.
Troubleshooting Keyframe Issues in CapCut
Running into problems? Here are the most common keyframe issues and how to fix them:
Keyframe not showing in timeline – Make sure you’ve actually selected the clip or layer before tapping the keyframe icon. If the layer isn’t selected, no keyframe will be created.
Motion not applying correctly – Check that you moved the playhead before making your adjustment. If you adjust first and then move the playhead, the keyframe sequence won’t record properly.
Lag in preview playback – This usually happens with high-resolution clips or many layers. Try lowering the preview quality temporarily go to Settings and reduce preview resolution while editing.
Sync problems between keyframes and audio – Zoom into your timeline for precise keyframe placement. Use the beat detection feature in CapCut to automatically mark beats, then align your keyframes to those marks.
Keyframe deleted accidentally – Tap the red diamond on the timeline and look for a delete option. If you’ve already undone the change, use the Undo button (Ctrl+Z on PC, the back arrow on mobile) to restore it.
Frequently Asked Questions
What is a keyframe in CapCut?
A keyframe is a marker that records the state of an element (its position, size, rotation, or opacity) at a specific moment in your video. CapCut uses keyframes to automatically animate the smooth transition between two different states.
Can I use keyframes on CapCut mobile?
Yes, absolutely. CapCut mobile has full keyframe support. Just select your clip or layer, move the playhead to your desired start point, and tap the diamond icon below the preview to set your first keyframe.
Are keyframes available in CapCut PC?
Yes. The desktop version of CapCut has even more keyframe control than mobile, including precise numeric adjustments, custom easing curves, and the ability to keyframe opacity and audio separately.
Why are my keyframes not working?
The most common reasons are: (1) the layer wasn’t selected when you tapped the keyframe icon, (2) you made your adjustment before moving the playhead, or (3) you’re trying to keyframe a property that isn’t supported for that specific element type.
Are keyframes free in CapCut?
Yes, keyframe animation is available in the free version of CapCut on both mobile and PC. You don’t need a CapCut Pro subscription to use this feature.
Conclusion
Keyframes are genuinely one of the most powerful tools in CapCut and one of the most underused by beginners. Once you understand the concept and practice it a few times, you’ll wonder how you ever edited without them.
Start simple: Add Keyframes in CapCut by placing two keyframes on a single clip and creating a slow zoom. Preview it, adjust the timing, and export. That first successful keyframe animation will give you the confidence to try more complex effects.
Whether you’re editing on your phone during a lunch break or sitting at your desktop building a full-length YouTube video, keyframes in CapCut give you the same level of creative control that professional editors rely on without the learning curve of professional software.
Master keyframes, and your videos will never look flat again.