How to Overlay a Picture on a Video in CapCut? (Step-by-Step Guide)
I still remember the first time I tried to put a small logo on top of a video I was editing for a friend’s small business in Karachi. I had no idea where the option even was, and I ended up dragging my picture clip around the timeline for almost ten minutes before it finally landed where I wanted it. Once I figured it out, though, it took me less than thirty seconds every single time after that. That’s exactly why I’m writing this guide so you don’t waste the time I wasted.
Overlaying a picture on a video in CapCut App is one of those small skills that makes a huge visual difference once you know it. Whether you’re adding a brand logo, a reaction photo, a screenshot for a tutorial, or a simple picture-in-picture effect for your YouTube Shorts or Instagram Reels, this guide walks you through every step, on both mobile and PC, exactly the way I do it myself.
What you’ll learn:
- What a picture overlay actually means inside CapCut
- Why creators across India, Pakistan, Bangladesh, and the rest of South Asia are using overlays to grow their pages
- Step-by-step instructions for CapCut mobile and CapCut PC
- How to style your overlay so it looks professional, not pasted on
- Common overlay problems and how I personally fixed them
Who this guide is for: Beginners who have never touched the overlay tool before, as well as intermediate editors who want cleaner, more polished results.
When to use picture overlays in CapCut: Whenever you want to show two visuals at once a face cam over gameplay, a logo in the corner, a product photo beside your explanation, or a “before and after” comparison.
What Does Overlaying a Picture on Your Video Actually Mean?
In simple words, an overlay is a second layer placed on top of your main video. Your background video keeps playing, and your picture sits above it, visible at the same time. CapCut calls this the “Overlay” tool, and it works the same basic way whether you’re adding a photo, a sticker, or even another video clip.
What Is an Overlay Layer in CapCut?
Think of it like stacking two sheets of paper. The bottom sheet is your main video, and the top sheet is your picture, which you can resize, move, and make see-through if you want. CapCut keeps these as separate, independent layers, so editing one never disturbs the other.
When Should You Use Picture Overlays?
I personally reach for the overlay tool whenever I need to:
- Show a screenshot while explaining something in a tutorial
- Add a small “subscribe” or logo graphic that stays on screen
- Create a reaction-style video where my face sits in a corner box
- Compare two photos side by side, like a before-and-after transformation
Why Add a Picture Overlay to Your CapCut Videos?
Make Videos More Engaging
A plain video with no extra visual element can feel flat, especially on platforms where the average viewer scrolls past content within two or three seconds. An overlay gives the eye something extra to focus on, which often keeps people watching longer.
Add Logos, Watermarks, and Branding
If you create content regularly, putting your logo or page name as a small overlay in the corner protects your work from being reposted without credit, and it also builds brand recall. I do this on almost every video I export now, even short fifteen-second clips.
Create Picture-in-Picture (PIP) Effects
This is the classic “face cam in the corner” look you see in gaming videos or reaction content. The main footage plays in the background while a smaller picture or video box sits on top.
Enhance Tutorials, Reactions, and Social Media Videos
For tutorial-style content especially, overlaying a screenshot, a product photo, or a step-by-step image makes your explanation far easier to follow than just talking over a plain clip.
Requirements Before You Start
Update CapCut to the Latest Version
CapCut updates its interface fairly often, and the overlay icon’s position has shifted slightly in past updates. Before you start, open the Play Store or App Store and make sure you’re on the newest version so your screen matches the steps below.
Prepare Your Video and Image Files
Have your main video and the picture you want to overlay saved in your phone gallery or computer folder beforehand. This saves you from switching apps mid-edit, which I learned the hard way after losing my place in the timeline more than once.
Supported Image Formats
CapCut accepts common formats like JPG, JPEG, PNG, and WEBP. If you want a transparent background overlay, such as a logo without a white box around it, use a PNG file, since this format supports transparency.
How to Overlay a Picture on a Video in CapCut? (Mobile)
Create a New Project
Open CapCut on your phone and tap “New Project.”
Import Your Main Video
Select the video you want to use as your background and tap “Add” to bring it into the timeline. This becomes your base layer.
Add the Picture as an Overlay
Below your timeline, tap the “Overlay” icon, which looks like two squares stacked on each other. Then tap “Add Overlay” and choose the picture you want from your gallery.
Resize and Reposition the Image
Once the picture appears on your preview screen, pinch with two fingers to resize it, and drag it with one finger to move it wherever you want, top corner, bottom corner, or centered.
Adjust Overlay Duration
In the timeline, your picture overlay appears as a separate clip above the main video. Drag the left and right edges of this clip to decide exactly when the picture appears and disappears.
Save and Export Your Video
Once everything looks right in the preview, tap “Export” in the top right corner, choose your resolution and frame rate, and save the finished video to your phone.
Adding a Picture Overlay to a Video in CapCut on PC
Import Media Files
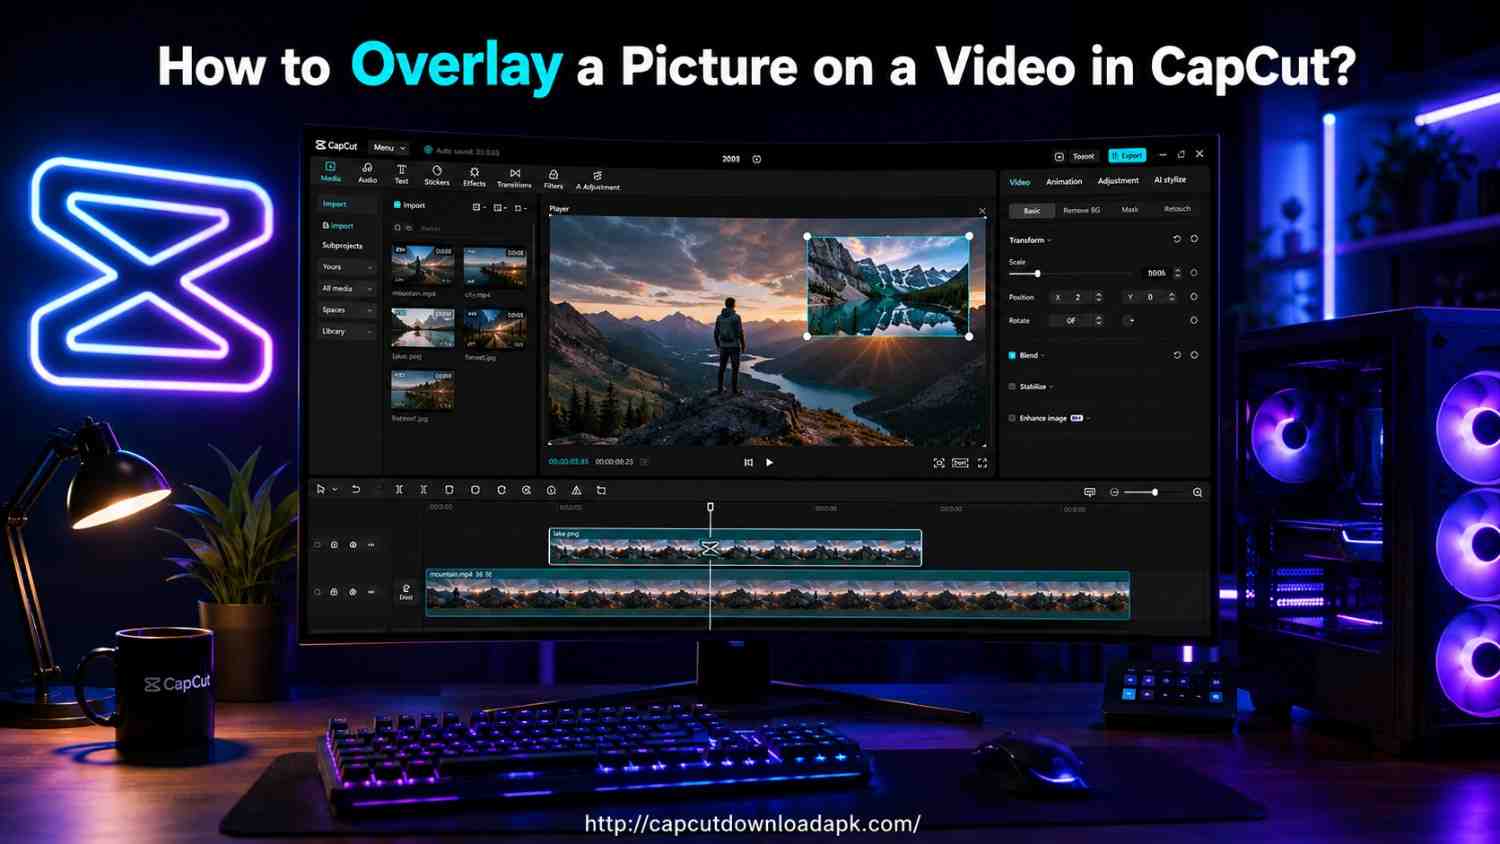
Open CapCut on your computer, start a new project, and click “Import” to bring in both your main video and the picture you plan to overlay.
Add the Overlay to the Timeline
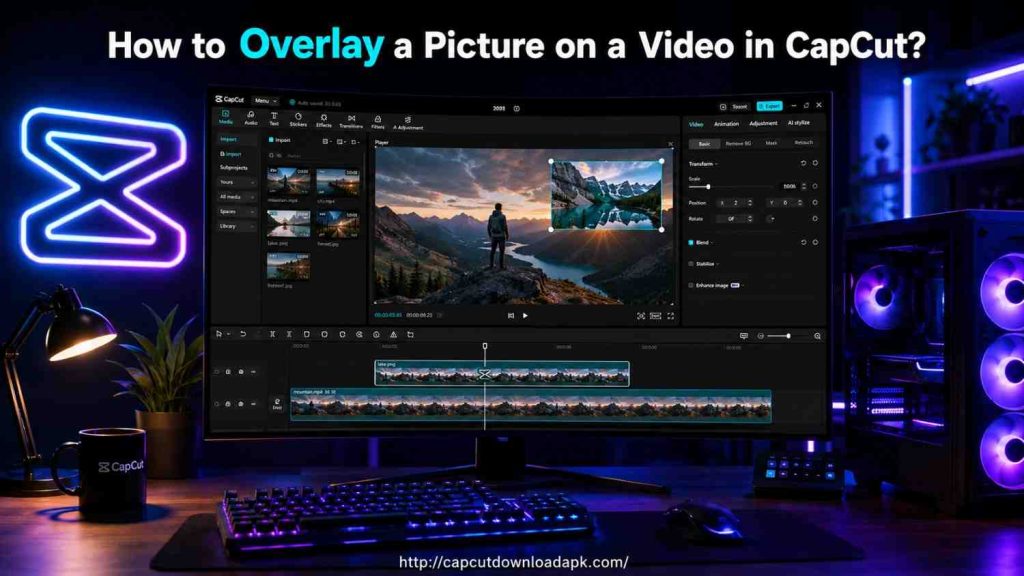
Drag your main video onto the primary timeline track first. Then drag your picture file onto a track directly above it, this stacking is what creates the overlay effect on desktop.
Resize, Crop, and Position the Picture
Click on the picture clip in the timeline, and use the on-screen handles in the preview window to resize and reposition it. You can also crop the image directly here if you only need part of it visible.
Export the Final Video
When you’re happy with how it looks, click “Export,” choose your preferred quality settings, and save the video to your computer.
Customize Your Picture Overlay Like a Pro
Adjust Opacity
Tap or click on your overlay clip, then find the “Opacity” slider. Lowering it slightly creates a soft, semi-transparent watermark effect that looks far more polished than a solid, opaque image.
Add Fade In and Fade Out Effects
Instead of having your picture pop in and out abruptly, select “Animations” on the overlay clip and choose a fade-in and fade-out option. It’s a small touch, but it instantly makes the edit look smoother.
Use Blend Modes
CapCut offers blend modes like Multiply, Screen, and Overlay (yes, that’s actually one of the mode names too) which change how your picture mixes with the colors of the video underneath. I usually try a couple of these to see which one matches the video’s tone best.
Apply Animation to the Overlay
Beyond fades, you can add entrance and exit animations like sliding in from the side or zooming in, found under the same “Animations” tab.
Add Shadows, Borders, or Frames
A thin white border or a subtle drop shadow around your overlay picture helps it stand out clearly from the background footage, especially useful for logos and picture-in-picture boxes.
Best Ways to Use Picture Overlays in CapCut
Add a Logo or Watermark
Place a small, semi-transparent logo in a corner that stays visible throughout the entire video.
Create Picture-in-Picture Videos
Resize a face cam or secondary clip into a small box, usually positioned in a corner of the main footage.
Add Stickers and Graphics
Overlay fun stickers or graphics to highlight a point, useful for meme-style or entertainment content.
Display Screenshots or Photos
For tutorials, overlay relevant screenshots exactly when you’re explaining that particular step.
Create Before-and-After Comparisons
Show two images side by side or one on top of the other with a wipe transition to highlight a transformation, popular in fitness, skincare, and renovation content.
Common Problems When Adding Picture Overlays (and How to Fix Them)
Overlay Option Not Showing
If you can’t find the Overlay icon, your timeline cursor might not be positioned over the video, or your app version might be outdated. Move the playhead onto your video clip first, and update CapCut if the option still doesn’t appear.
Picture Is Blurry
This usually happens when you stretch a small, low-resolution image far beyond its original size. Use higher-resolution pictures, ideally above 1080 pixels wide, to avoid pixelation.
Overlay Covers the Entire Video
If your picture is covering the whole screen instead of sitting as a smaller box, pinch to resize it down in the preview window, or manually drag the resize handles inward on PC.
Image Quality Drops After Export
Check your export settings before saving. Choosing a higher resolution and bitrate, such as 1080p at the highest available quality, usually solves this.
Overlay Is Missing After Export
This often happens when the overlay clip’s timeline duration doesn’t actually match the section you wanted it visible for. Double-check that the overlay clip’s start and end points line up correctly before exporting again.
Tips for Creating Professional Picture Overlays
Keep the Overlay Size Balanced
An overlay that’s too large distracts from your main video, while one that’s too small becomes hard to notice. A good rule I follow is keeping overlays to roughly fifteen to twenty-five percent of the screen size unless it’s meant to be the main focus.
Use High-Resolution Images
Always start with the highest quality picture available rather than resizing up later, since CapCut can shrink an image cleanly but cannot add detail that wasn’t there to begin with.
Match Colors with Your Video
If your overlay picture has a clashing color tone compared to your video, it can look out of place. Adjusting the picture’s brightness or saturation slightly to match your footage makes the overlay feel intentional rather than pasted on.
Avoid Blocking Important Content
Keep your overlay away from subtitles, faces, or any other key visual element your viewer needs to see clearly.
Maintain Consistent Branding
If you’re using a logo overlay, keep its size and position identical across all your videos. This consistency is what makes a channel or page feel professional over time.
CapCut Overlay vs Sticker Feature
Key Differences
The overlay tool is built for your own pictures and videos, giving you full control over resizing, positioning, opacity, and timing on the timeline. The sticker feature, on the other hand, pulls from CapCut’s built-in library of pre-made graphics, emojis, and animated elements that you simply drag onto your video.
Which One Should You Use?
Use overlay when you’re adding your own photo, logo, screenshot, or a picture-in-picture clip. Use stickers when you want quick decorative elements like animated icons, text bubbles, or trending graphics without uploading anything yourself.
Frequently Asked Questions
Can I overlay multiple pictures in CapCut?
Yes. You can add as many overlay layers as you need by repeating the “Add Overlay” step for each new picture, and CapCut will stack them on separate tracks in your timeline.
How do I change the transparency of a picture?
Select your overlay clip, find the “Opacity” option in the editing panel, and drag the slider until you reach the transparency level you want.
Can I animate a picture overlay?
Yes. Tap your overlay clip, go to “Animations,” and choose from entrance, exit, or combined animation styles such as fade, slide, or zoom.
Does CapCut support PNG images with transparent backgrounds?
Yes, CapCut fully supports transparent PNG files, which is the best format to use for logos and watermarks so they blend naturally into your video.
Can I overlay pictures on both Android and iPhone?
Yes, the overlay feature works the same way on both Android and iOS versions of CapCut, with only minor differences in icon placement depending on your app version.
Is the overlay feature available in CapCut PC?
Yes, CapCut for PC supports overlays as well, though instead of a dedicated overlay button, you create the effect by stacking your picture on a track above your main video in the timeline.
Conclusion
Overlaying a picture on a video in CapCut sounds technical the first time you hear it, but once you’ve done it a single time, it genuinely becomes second nature. Whether you’re a small business owner branding your videos for the first time, a student making tutorial content for college, or a creator chasing better engagement on Instagram and YouTube, this one feature can noticeably lift the quality of everything you publish. Start with a simple logo overlay on your next video, get comfortable with resizing and timing it, and then slowly experiment with opacity, animations, and blend modes as you grow more confident.